
The final inspection is close, the walls are patched, the oven is finally under control, and then you look at the vertical blinds. Dust on the edges. A few finger marks near the balcony door. Maybe a patch of grime in the kitchen, or a mouldy tinge near a damp window. For a lot of Melbourne tenants, that's the moment the bond stress kicks in.
Vertical blinds catch more scrutiny than people expect. Property managers don't just see whether they're cleaner. They notice whether the vanes hang straight, whether the clips still work, and whether the headrail opens properly. A blind that looks freshly wiped but has snapped tabs or misshapen fabric can still become a problem at inspection.
After years of end-of-lease work, the same mistake keeps showing up. People rush the cleaning, use too much water, pull the vanes the wrong way, and turn a simple tidy-up into damage. If you're asking how do you clean vertical blinds properly, the better question is this: how do you clean them well enough to pass inspection without breaking anything in the process?
The End-of-Lease Blind Inspection You Need to Pass
A final walkthrough usually happens fast. You notice things you stopped seeing months ago. The blinds by the living room window have a grey film on them. The bedroom vanes don't line up evenly. One fabric slat has a mark where someone touched it with wet hands after opening the window on a cold morning.
That's exactly when people start overcorrecting. They yank vanes off the track, soak fabric that shouldn't be soaked, or scrub marks so hard the surface looks worse than the stain. On an end-of-lease clean, blinds aren't just another dusty surface. They're part of the “working condition” check.
Property managers usually look at blinds the same way they look at flyscreens or cupboard doors. Clean matters, but usable matters just as much.
What makes vertical blinds tricky is that the mess and the damage often sit together. Dust settles along the edges. Grease collects near kitchens. Moisture marks show up near windows. At the same time, the top tabs become fragile, the clips can misalign, and older fabric can distort if handled roughly.
If you're doing your own vacate clean, treat blinds as a separate task, not an afterthought on your list. A proper end-of-lease cleaning checklist helps because it stops you from leaving them until the final hour, when most damage happens through haste.
What usually fails inspection
- Visible dust: Especially on the leading edges and bottom hems.
- Obvious marks: Fingerprints, splash marks, kitchen grime.
- Poor hanging: Twisted or uneven vanes stand out immediately.
- Mechanism issues: Tracks that stick, clips that don't hold, slats that won't rotate neatly.
If the blinds are only dusty, this is manageable. If they're dirty and delicate, the job changes from cleaning to controlled handling.
Your First Defence Regular Dusting and Upkeep
Most blind cleaning jobs are made harder by neglect, not by the material itself. If the dust sits long enough, it mixes with cooking residue, moisture, and everyday grime. Then a quick wipe turns into a full clean.
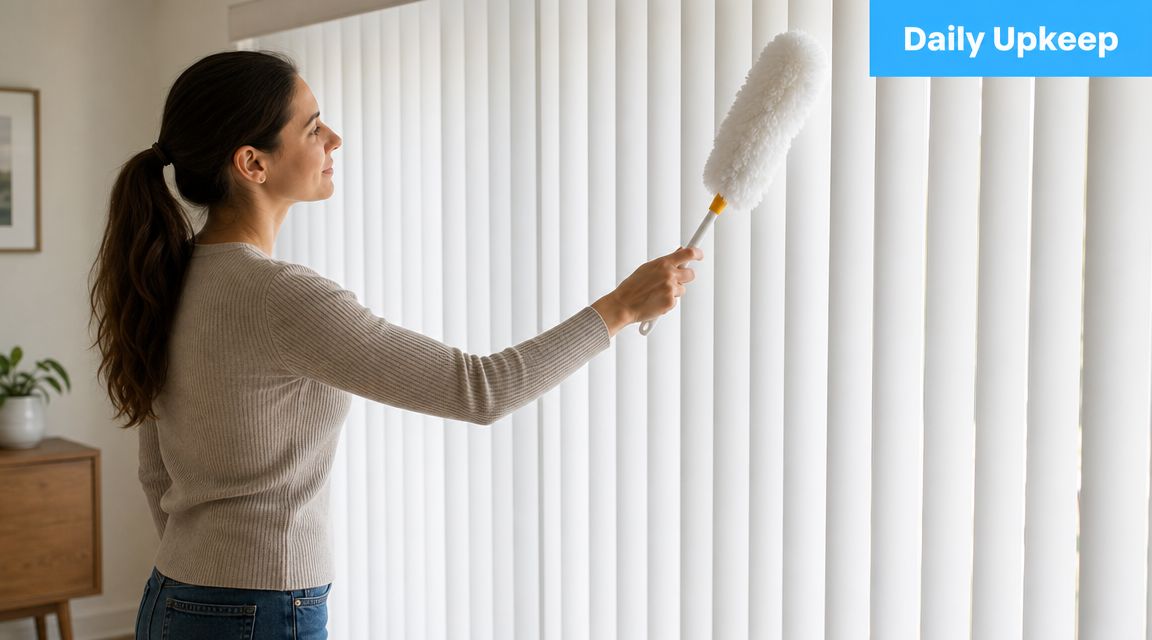
Regular upkeep is the easiest way to avoid that. Australian blind-care guidance recommends weekly dusting with a microfiber cloth or a vacuum brush attachment to stop buildup before it becomes stubborn grime, and Consumer Reports also specifies a simple wipe-down method using 3–4 drops of dishwashing liquid in a bucket of warm water when the vanes need more than dusting, with each slat dried afterwards to avoid streaks and water spots, as outlined in this Consumer Reports guide to cleaning window blinds.
The simple routine that works
Close the blinds so the vanes sit in the same direction. That gives you a flat enough surface to remove loose dust without chasing each slat around. Use a dry microfiber cloth first. If you prefer a vacuum, fit the brush attachment, not a bare nozzle.
Then reverse the blinds and repeat on the other side.
For light film or city dust that won't lift dry, move to a well-wrung microfiber cloth with mild soapy water. The cloth should feel barely damp, not wet. Wipe top to bottom, support the vane with your other hand, and dry it straight away.
What to use and what to avoid
- Best everyday tool: A microfiber cloth. It lifts dust without scratching and doesn't dump lint back onto the vane.
- Good second option: A vacuum with a soft brush head. Useful if the blinds are textured or you have allergies.
- Safe wipe mix: Warm water with a very small amount of dishwashing liquid.
- Avoid: Abrasive pads, dripping cloths, and heavy sprays applied straight onto the blinds.
Practical rule: If water runs down the vane, the cloth is too wet.
Why this matters in Melbourne homes
In inner-city flats and busy suburban roads, blinds often collect fine dust faster than people realise. In kitchens and near sliding doors, they also pick up hand oils and airborne residue. Weekly light cleaning is boring, but it's what prevents the grimy edge line that makes blinds look old and neglected.
If you've kept up with this routine, you may never need to remove the vanes at all. That lowers the risk of snapping clips, bending hooks, or creating fresh marks while trying to fix old ones.
How to Spot-Clean Blinds Without Taking Them Down
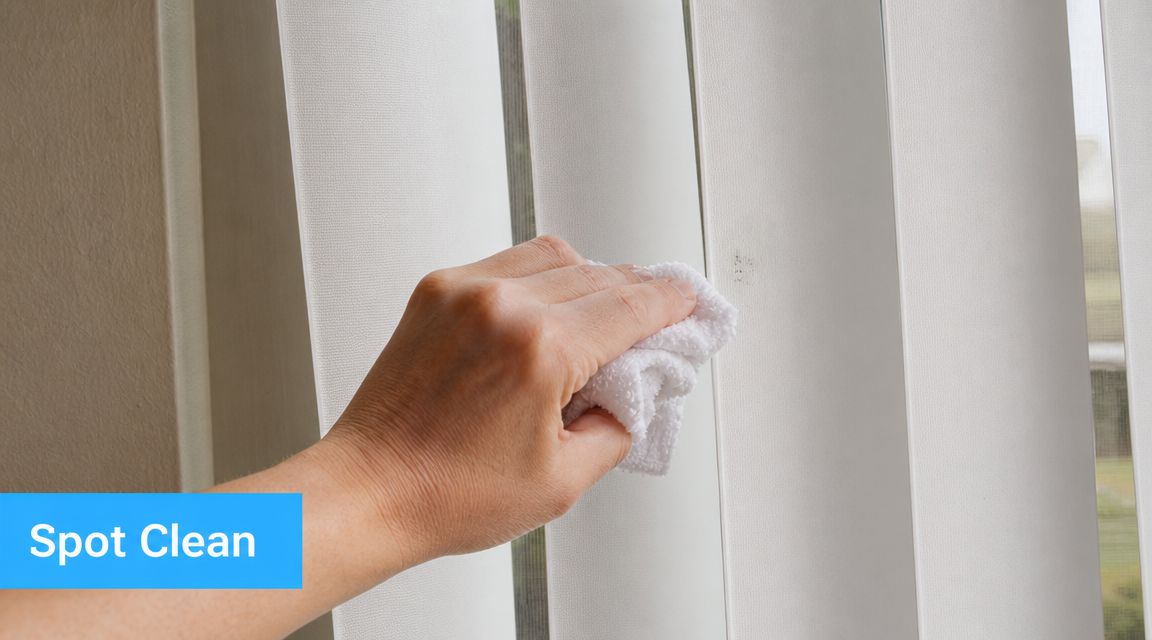
Before you unhook anything, test whether the problem is local. A surprising number of vertical blind marks are isolated. One greasy thumbprint. One splash near a sink. One dark rub mark where a vane brushes the wall. Those don't call for a full wash.
Start with the least aggressive method
Rotate the blinds so the marked side faces you. Support the bottom of the vane with one hand to stop it twisting while you clean. Use a microfiber cloth that's only slightly damp and work on the mark in short passes from top to bottom.
Don't scrub in circles. That often creates a larger patch, especially on fabric-look surfaces and lighter colours.
For many PVC or vinyl vanes, a mild wipe is enough. If the mark lifts, stop there. Don't keep cleaning the whole slat just because you've started. Overworking the area is how water marks and uneven finish appear.
Know the difference between a mark and a stain
A surface mark usually sits on top of the material. It responds quickly to a damp cloth and doesn't leave a shadow once dry.
A set stain behaves differently. You wipe it, it lightens a little, then comes back as the material dries. That's common with older grease, smoke residue, and moisture staining. At that point, repeated wiping rarely helps and may damage the vane.
Use this quick check:
- If it lifts fast: Finish with a dry cloth and leave it alone.
- If it smears: You're dealing with grease or residue. Slow down and avoid spreading it across the slat.
- If it remains as a dull patch: It may be permanent staining rather than dirt.
This walkthrough is useful if you want to see the handling pace before trying it yourself.
The fast pre-inspection tidy-up
If inspection is close and the blinds are mostly presentable, spot-clean only the areas that catch the eye first:
- Door-side edges where hands touch regularly.
- Lower sections where pets or shoes may have brushed them.
- Kitchen-facing vanes that pick up airborne residue.
- Window-adjacent slats that show condensation marks.
Clean what stands out in normal room light first. Inspection standards usually begin with what's visible at a glance, not what only shows under a torch.
This method saves time and, notably, avoids unnecessary removal of vanes that were hanging fine to begin with.
A Deep Clean Method for Every Blind Material
Deep cleaning only works when the method matches the material. That's where many DIY jobs go wrong. People treat all vertical blinds the same because they look similar when hanging, but they don't react the same way to water, rubbing, or drying.
For fabric vertical blinds, Australian maintenance advice is clear. Water exposure should be controlled, spot-cleaning should be done with a damp cloth, and the fabric needs to air dry completely before reattaching or closing because soaking can cause the vanes to lose shape, as noted in this guide to cleaning vertical blinds.
Quick comparison before you start
| Material Type | Best Deep Clean Method | Key Precaution |
|---|---|---|
| PVC or Vinyl | Wipe each vane in place with mild soapy water, then dry thoroughly | Don't leave water sitting on the surface or in edges |
| Fabric | Controlled spot-cleaning with a damp cloth, then full air drying | Don't soak or oversaturate |
| Aluminium or Metal | Gentle wipe with mild solution, then immediate drying | Avoid excess moisture that can leave marks |
PVC and vinyl blinds
These are usually the most forgiving. If the vanes are smooth, slightly curved, and moisture-resistant, they can handle a more thorough hand-clean than fabric.
Close the blinds, clean one side, reverse them, and clean the other. Use a well-wrung microfiber cloth with mild soapy water. Work from the top down so you don't drag dirt over sections you've already cleaned.
If a vane is especially dirty, isolate it and wipe it again rather than soaking the entire blind set. The goal is to remove residue without flooding the top tab or leaving drips in the track area.
Best practice for vinyl and PVC
- Support the vane: Stop it swinging while you wipe.
- Dry immediately: This prevents streaks and patchy finish.
- Check edges: Dust and grime often cling there longer than the flat face.
Fabric vertical blinds
Fabric needs patience more than force. A heavy wet clean often creates a second problem. The stain may fade, but the vane can dry with ripples, edge distortion, or a softened finish that never sits right again.
Use a damp microfiber cloth and treat marks locally. Blot or wipe gently in straight motions. Then leave the vane open so air can move around it and let it dry fully before you try to close or reattach anything.
If the fabric is heavily soiled across many vanes, DIY cleaning becomes a judgment call. When too many slats need treatment, repeated damp cleaning can create uneven colouring or leave some vanes flatter than others.
If a fabric vane already looks soft, bowed, or tired, aggressive cleaning usually finishes it off.
Aluminium and metal-look blinds
These are less common in homes than PVC or fabric, but they do show fingerprints and moisture marks quickly. Use the same mild solution approach as vinyl, but be stricter about drying. Water left sitting on metal-look finishes can leave a dull appearance.
Keep your cloth soft and clean. Grit trapped in the cloth can scratch the surface, especially on lighter finishes.
When removal makes sense
Only remove vanes when one of these is true:
- The blind is too dirty to clean properly in place
- The back side is inaccessible because of placement
- A single vane needs repair or replacement
- The headrail also needs attention
If you're unsure what material you're handling, stop and identify that first. This matters just as much with other window coverings too. The same material-first thinking applies when dealing with roller blinds that need a different cleaning method.
A deep clean should leave the blinds cleaner and still hanging properly. If your method risks the second part, it's the wrong method.
Avoiding Common Damage Drying and Reinstallation
Most blind damage doesn't happen during the wipe-down. It happens afterwards, when people think the hard part is over.
They hang vanes back while still damp. They push tabs into clips at an angle. They tug on a stubborn slat instead of checking the hook. That's when a blind that was dirty but functional becomes clean but broken. For a bond return, that's a bad trade.
Independent blind-care guidance notes that the plastic tabs at the top of each vane can break if pulled incorrectly, and that soaking fabric vanes can strip dust-repellent coating and cause them to lose shape, which is exactly the kind of avoidable damage tenants run into during a rushed vacate clean, as outlined in this vertical blind cleaning guide from Blinds.com.
Drying is part of the clean
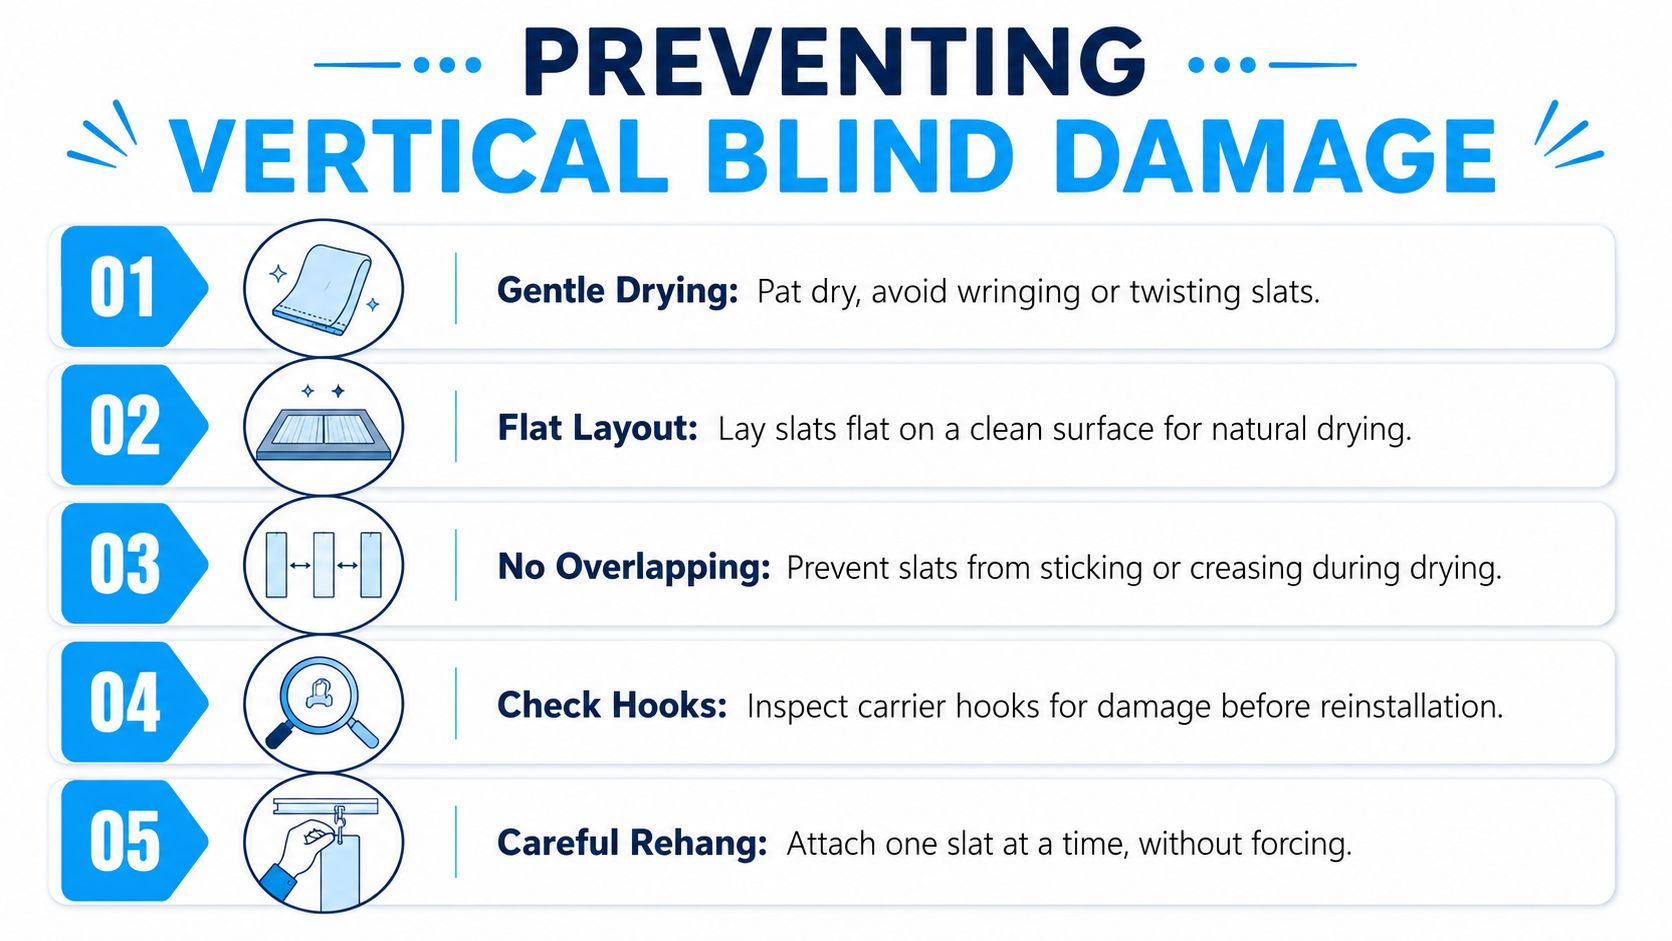
A vane that's still damp can collect fresh dust, show water spots, or dry unevenly once it's hanging. Fabric is the highest-risk material here, but even vinyl can look streaky if you rush it.
Use this checklist:
- Pat, don't twist: Remove surface moisture gently with a clean cloth.
- Give each vane space: Don't press wet slats together.
- Let air circulate: Keep blinds open while drying where possible.
- Check before closing: If the vane still feels cool or damp, it isn't ready.
- Inspect the top area: Moisture near tabs and clips causes trouble later.
Rehanging without snapping clips
This is the part tenants underestimate. The top tab may look sturdy, but older plastic gets brittle. If you pull the vane down and sideways at the same time, the tab can crack. Once that happens, the slat may not sit properly again.
Reinstall one vane at a time. Line the tab up with the carrier carefully. If it doesn't slot in with light pressure, don't force it. Check whether the carrier is twisted or whether you're approaching it from the wrong angle.
A safer reinstallation routine
Examine the carrier first
Make sure the hook or clip is facing the correct way and isn't bent.Hold the vane near the top
Don't let the full weight hang from the tab while you fumble with alignment.Attach gently
A controlled click or slide is what you want. Resistance means stop.Test the movement slowly
Rotate the blinds and draw them across only after all vanes are seated properly.
A clean blind that doesn't traverse smoothly still looks like a problem at inspection.
When replacement is smarter than cleaning harder
Sometimes the vane isn't dirty. It's past saving. A cracked tab, badly distorted fabric, or permanently warped slat won't improve with more effort. In those cases, replacing the individual vane is safer than trying another round of washing and handling.
If you're weighing DIY against outside help, one practical option is to book blind cleaning as part of a broader vacate service through End Of Lease Cleaning Melbourne, especially when the blinds are delicate and the inspection outcome matters.
Tackling Mould Grease and When to Call a Professional
Melbourne rentals often produce the same two hard blind-cleaning jobs. Kitchen grease and window-side mould. Both look worse at inspection than ordinary dust, and both tempt people into overcleaning.
In humid Australian coastal areas, mould on vertical blinds needs more than dusting. Persistent humidity means moisture management and mould-specific treatment matter as much as the cleaning method, as explained in this guide on cleaning vertical blinds affected by damp conditions. That matters in Melbourne homes too, especially in bathrooms, bedrooms with poor airflow, and older properties where condensation builds up on windows.
What you're actually looking at
Grease usually appears as dull, tacky buildup, most often on blinds near cooktops or adjoining open-plan kitchens. It smears when wiped and tends to catch dust immediately afterwards.
Mould or mildew often looks different. You may see spotting, shadowy discolouration, or staining that sits deeper in the material. If the mark remains after gentle cleaning, the issue may no longer be surface dirt.
When DIY stops being sensible
Call in help when any of these apply:
- Fabric vanes show mould spotting across multiple slats
- The blinds still smell musty after drying
- Cleaning has exposed damage in tabs, clips, or the track
- The staining appears set into the material rather than on it
- You're close to inspection and can't afford trial and error
For mould concerns, it also helps to understand whether you're dealing with a cleaning issue or a wider damp problem in the property. Proper mould remediation in Melbourne homes becomes relevant, especially if marks keep returning after surface cleaning.
If the blinds are lightly dusty, DIY is fine. If they're fragile, mould-affected, greasy, or already half-damaged, the risk changes. At that point, preserving the mechanism and presenting the property well is usually more important than insisting on doing every part yourself.
If your vertical blinds need more than a quick wipe, End Of Lease Cleaning Melbourne can handle blind cleaning as part of an end-of-lease clean, along with the rest of the vacate work. That's often the safer option when you're dealing with delicate fabric vanes, mould concerns, or an inspection date that's too close for trial-and-error cleaning.
