
The last week of a lease is when silicone mould suddenly becomes urgent. You notice the black line along the shower base or around the sink, grab a cloth, scrub hard, and realise it isn't lifting. That's usually the moment the stress kicks in. If this still looks bad on inspection day, will it cost part of the bond?
I've seen this catch out plenty of Melbourne tenants. The problem isn't just dirt. Mould on silicone behaves differently from mould on tile or glass, and that's why ordinary bathroom cleaning often doesn't touch it. Some growth sits on the surface. Some gets into the silicone itself. Some leaves staining that won't scrub out no matter how long you stay on your knees with a brush.
That's the key decision point. Do you keep cleaning, or do you stop and replace the sealant? If you want a practical answer to how to remove mould from silicone, that's the question that matters most at end of lease.
That Stubborn Black Mould in the Shower
A typical end-of-lease bathroom goes like this. The tiles are cleaned, the taps are polished, the screen looks decent, then your eye lands on the silicone. Along the bottom edge of the shower, there's a dark line that makes the whole room look unfinished. Even if the rest of the bathroom is spotless, that sealant can make it look neglected.
Tenants often tell themselves it just needs “a good scrub”. Sometimes that's true. If the mould is fresh and only sitting on the surface, you can improve it. But silicone is tricky. It isn't like tile grout where you can go harder and expect a better result. If you attack it with aggressive tools, you can damage the bead and make the finish worse.
Practical rule: If the mould is only a light surface issue, cleaning can help. If the silicone is blackened, patchy, peeling or permanently stained, cleaning may not be the smart end-of-lease move.
The reason this matters at vacate time is simple. Property managers notice bathroom edges, corners and seals fast. They look at shower screens, tile grout and silicone because those areas show wear immediately.
What tenants usually get wrong
- They start with scrubbing. That often spreads the mess and wastes time.
- They use abrasive tools. Metal scrapers and harsh brushes can rough up the surface.
- They keep going too long. Hours spent chasing a stain that won't move is common.
- They treat all black marks as active mould. Some of what you see is staining left inside the silicone.
If you're trying to get inspection-ready, the goal isn't to win a battle with one shower corner. The goal is to make a clean decision early, use the right method first, and know when replacement is the cleaner finish.
Safety First When Tackling Mould
Before you open a bottle of anything, set the area up properly. Mould spores and bathroom chemicals are a bad combination in a small, steamy room. If you're working in an ensuite with poor airflow, preparation matters as much as the product.
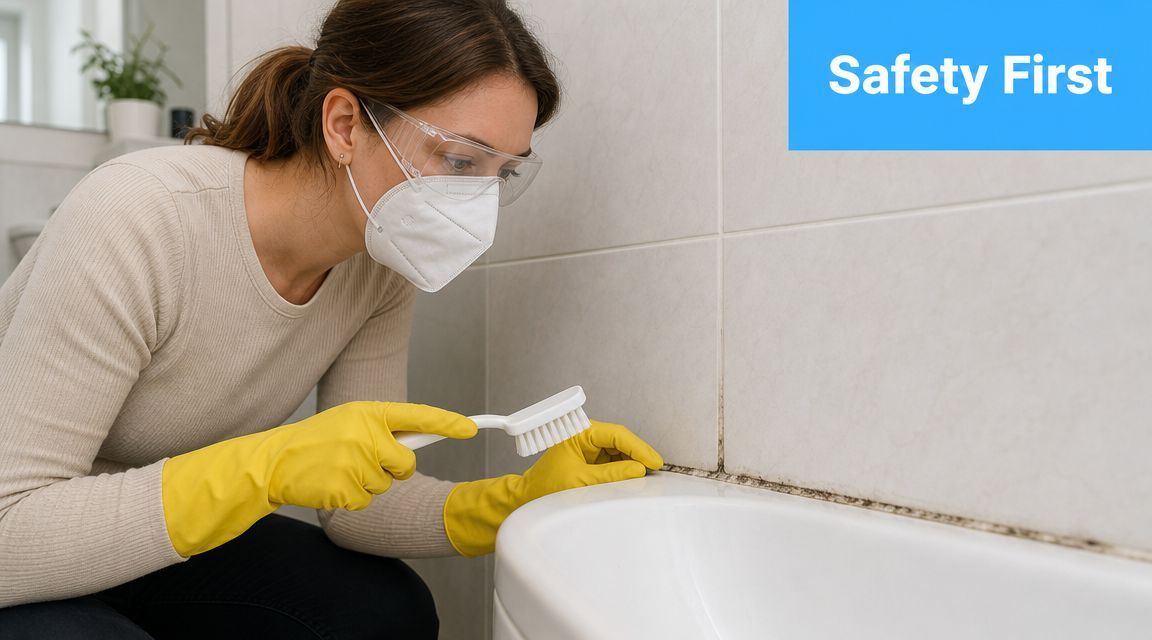
Open windows first. Run the exhaust fan if there is one. If the bathroom doesn't ventilate well, keep the door open and avoid trapping fumes in the room while you work. That helps with both mould disturbance and cleaning-product exposure.
PPE that's worth using
You don't need a full hazmat setup, but a few basics are essential.
- Waterproof gloves protect your skin from mould residue and stronger cleaners.
- A P2 or N95 mask helps reduce what you breathe in while you're brushing or wiping.
- Old clothes are better than good ones, especially if you're using bleach-based products.
- Eye protection is sensible if you're applying gel overhead or around splash zones.
Set up the space before you spray
Use a dry paper towel or old cloth to remove loose dust, hair and soap scum first. That stops you turning surface grime into a wet slurry. Keep a rubbish bag nearby so contaminated cloths and paper towels go straight out instead of sitting on the vanity.
Don't mix products. If you try one cleaner and then switch to another, rinse thoroughly and let the area settle before applying anything else. Fast, frustrated cleaning is when people make bad decisions.
Work slower than you think you need to. Most mistakes happen before the actual cleaning starts.
If you've got kids, pets, or housemates moving through the property, block the area off until you're done and the room has aired out. At end of lease, there's already enough chaos without adding avoidable irritation from mould or fumes.
Effective DIY Mould Cleaning Solutions
For light mould, DIY options can be worth trying first. They're accessible, easy to test on a small area, and useful for ongoing maintenance. The key is keeping expectations realistic. DIY methods can help with surface mould. They often struggle when the black mark is embedded in the silicone.
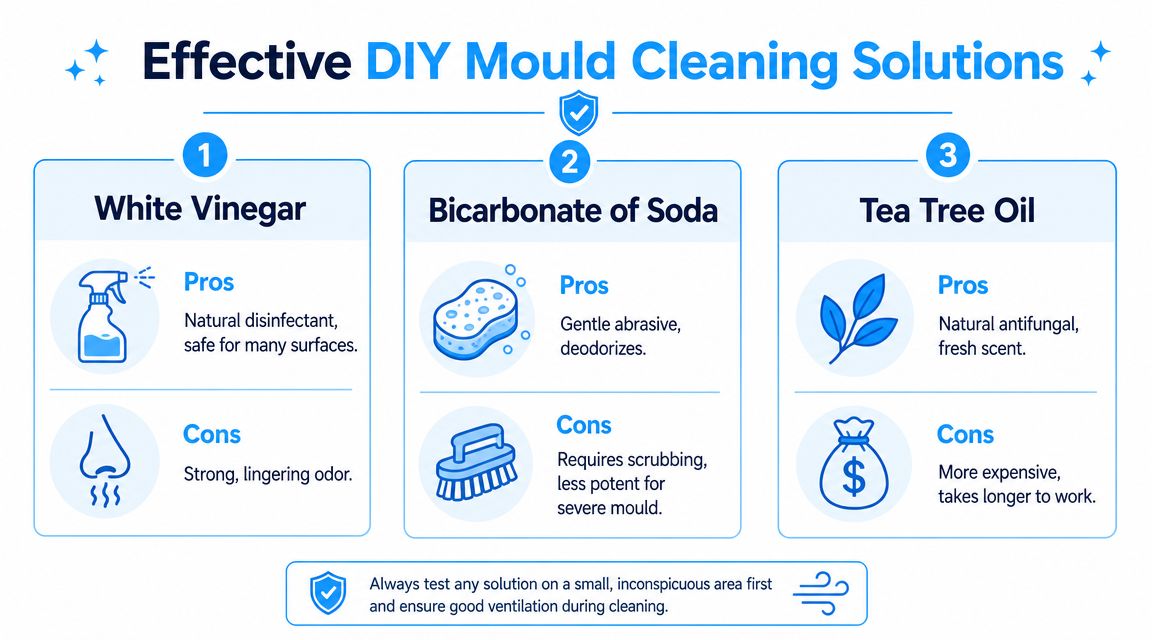
White vinegar
White vinegar is the usual first DIY choice because it's simple and easy to apply. Spray it onto dry silicone, let it sit, then wipe and gently brush if needed. It's best for early mould growth and general bathroom upkeep.
Pros
- Easy to keep on hand
- Useful for light surface mould
- Good as a maintenance cleaner
Cons
- The smell hangs around
- It may not shift deep staining
- It won't fix damaged sealant
Bicarbonate of soda
Bicarb is better as a support product than a standalone fix. Mixed into a paste, it gives gentle abrasion, which can help lift residue from the surface without going in too hard. That makes it a more forgiving option than an aggressive scrubbing pad.
Tea tree oil
Tea tree oil is another common home remedy. Some tenants prefer it because the scent is easier to tolerate than vinegar. It's still a slower, lighter-touch option, and I'd treat it as a maintenance method rather than an end-of-lease rescue.
A related place mould builds up is inside appliances with rubber seals and damp compartments. If you're doing the full vacate clean, this guide on cleaning a front loader washing machine helps with another common inspection problem.
Here's a quick visual before choosing your method.
| DIY option | Best use | Main limitation |
|---|---|---|
| White vinegar | Light surface mould | Odour and limited effect on deep stains |
| Bicarb paste | Gentle lifting and deodorising | Needs scrubbing |
| Tea tree oil | Ongoing maintenance | Slower and usually pricier |
Later in the process, this video is useful if you want to see mould cleaning methods in action before you start:
A better way to use gentle cleaning methods
If you're cleaning removable silicone items in the home, a gentler wash process matters. An Australian silicone-cleaning guide recommends starting with a dry wipe, then washing with warm water and mild detergent, using roughly 70°C water, allowing about 30 minutes for residue breakdown, and then rinsing with hot water and fully air-drying before storage, while avoiding abrasive tools and over-compression during storage (Australian silicone cleaning guide). That advice applies to removable silicone surfaces, not bathroom sealant fixed to walls, but the principle is useful: silicone scratches more easily than people think.
If your DIY method only lightens the mark and the line still looks grey or black after drying, don't assume another hour of scrubbing will solve it.
That's usually the sign to move on to a stronger product, or to stop thinking about cleaning altogether and start assessing whether the sealant itself has failed.
Using Commercial Mould Removers
You're a day or two out from the final inspection, the shower silicone is still black after the DIY round, and now the question changes. You are no longer asking what might clean it. You are asking whether more effort will improve how it looks on inspection day.
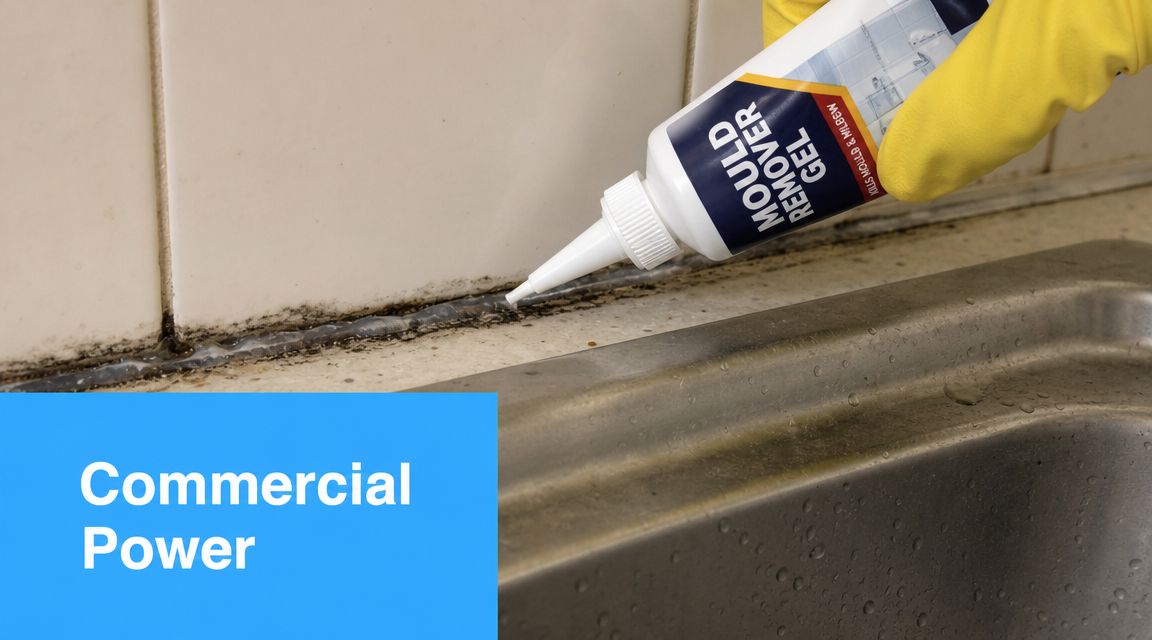
Commercial mould removers are the point where tenants either save the silicone or waste another hour on a bead that should have been replaced. In practice, these products work best on intact silicone with visible mould sitting on or near the surface. They work poorly on silicone that has already failed.
The biggest mistake I see is using a mould remover like an everyday bathroom spray. Silicone needs contact time, especially on vertical joints and shower corners. Gel formulas usually do better here because they stay put instead of running straight down the tile.
What to choose
Pick a dedicated mould remover that is made for bathroom use and suitable for silicone. A bleach-based gel is often the most practical option for shower recesses because it clings to the bead and keeps working while it sits. Thin sprays can still help on light surface growth, but they are less reliable on dark spotting along corners and tray edges.
This is also the stage where the clean-versus-replace decision becomes clearer. If the silicone still looks evenly sealed, firmly attached, and only discoloured, a commercial remover is worth trying. If it is peeling, split, or shrinking back from the tile, skip the heroics. You are treating a failed seal, not just mould.
How to apply it properly
Use this order:
- Dry the silicone first. Moisture weakens the product.
- Apply the remover along the whole affected bead. Cover the full line, not just the darkest patch.
- Let it sit for the label-recommended dwell time. That is where most of the result comes from.
- Wipe or lightly agitate if needed. Use a soft cloth or an old toothbrush, not anything abrasive.
- Rinse well and let the area dry fully. Wet silicone can look cleaner or dirtier than it really is.
Then check it again in good light.
That last step matters. I have seen plenty of tenants keep scrubbing damp silicone, thinking the product has failed, when the bead has not dried yet. I have also seen the opposite. The area looks acceptable while wet, then dries back to a grey-black stain that will still stand out at inspection.
What works and what doesn't
Usually worth trying
- Fresh to moderate mould on intact silicone
- Shower corners and edges where a gel can stay in contact
- End-of-lease touch-ups where the bead still looks structurally sound
Usually a poor use of time
- Peeling or loose silicone
- Cracked, shrunken, or uneven sealant
- Black staining that remains after treatment and full drying
If you do not want to handle it yourself, professional mould remediation in Melbourne can help assess whether the issue is removable surface growth or sealant that has reached replacement stage.
The product needs time on the silicone, not harder scrubbing.
That is the primary value of commercial remover. It gives you a proper final test. If the silicone responds, you may get it inspection-ready. If it does not, you have your answer early enough to push for resealing instead of losing time and risking your bond.
When Cleaning Is Not Enough
You can lose an hour trying to save a silicone bead that was never going to come good. At end of lease, that hour matters.
The call to make is simple. If the silicone is intact and the staining is lifting, keep cleaning. If the bead is split, peeling, shrunken, soft, or still black after treatment and full drying, stop scrubbing and treat it as a reseal job. That is usually the safer path if you want the shower to look inspection-ready.
Signs the sealant should be replaced
Mould on the surface can often be cleaned. Mould staining inside old silicone is different. Once the material has broken down, no product is going to give you a clean white line again.
Replace the silicone if you can see any of these:
- It has lifted from the tile, glass, or shower base. The seal has failed.
- There are gaps, splits, or obvious shrinkage. Water can get behind the bead.
- The surface feels rough, brittle, soft, or patchy. The silicone itself is worn out.
- Black marks remain after cleaning and full drying. The staining is embedded, not sitting on top.
- The same section keeps growing mould back quickly. That usually points to failure in the bead, not just a dirty surface.
Why replacement is often the better bond decision
Property managers inspect what they can see. They are not grading effort. They are looking for a bathroom that appears clean, maintained, and free of obvious mould.
That is why tenants get stuck here. The silicone may be cleaner than it was, but if it still reads as mouldy from standing height, it can still raise issues at final inspection. I would rather see a tenant make the replacement call early than keep chasing a result the old sealant cannot deliver.
There is also a practical trade-off. Cleaning is cheaper and faster if the bead is sound. Replacement takes more coordination, and in a rental you may need the agent or landlord to approve it. But if the sealant is visibly failing, continued cleaning can waste your last free day and still leave you arguing over the bond.
If the mould problem goes beyond one shower join and looks like a wider moisture issue, this guide to mould remediation in Melbourne is a better next step than treating every mark as a simple silicone clean.
Clean or replace decision guide
| Condition | Best move |
|---|---|
| Light mould on sound, well-adhered silicone | Clean |
| Staining improves but still shows after drying | Decide based on visibility at inspection, replacement is often smarter |
| Peeling, gaps, shrinkage, soft spots, or cracked bead | Replace |
| Mould keeps returning in the same damaged section | Replace |
Do not spend the last day of your lease trying to rescue silicone that has already failed.
If you want the short version, use this test. Clean when the silicone is still doing its job. Replace when it no longer seals properly or still looks mould-stained after a fair cleaning attempt.
Keeping Mould Away for Good
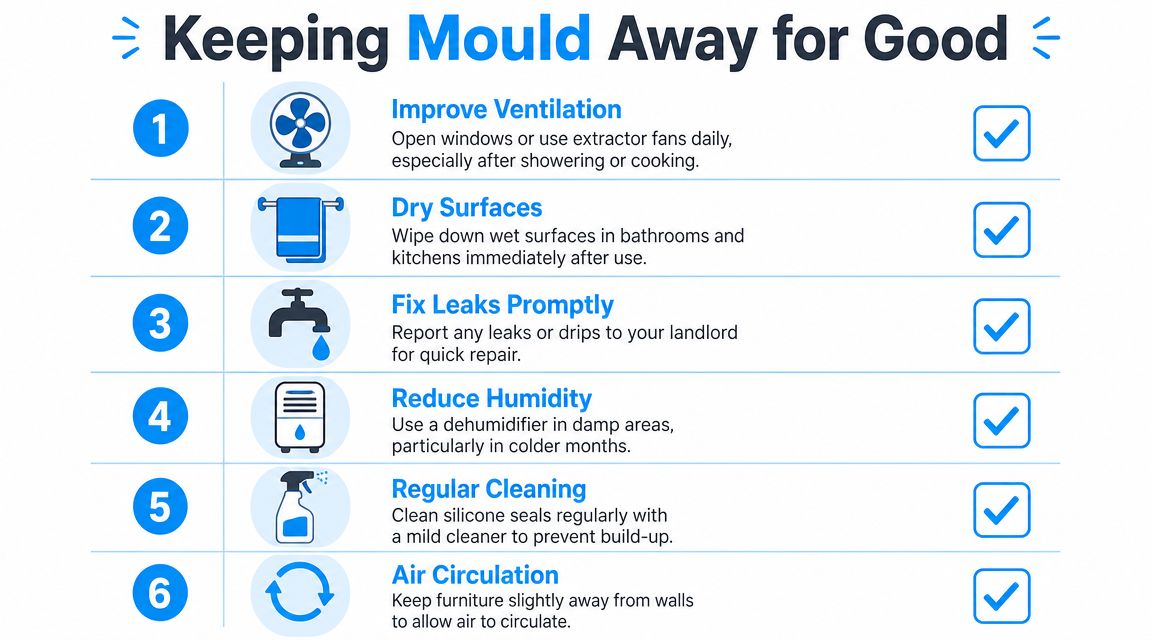
Once the silicone is clean, or newly resealed, the next job is keeping moisture from sitting there long enough for mould to return. In rentals, prevention doesn't need to be complicated. It just needs to be consistent.
The routine that actually helps
After every shower, run the exhaust fan and leave it on for a while after you finish. If there's a window, open it. Then wipe the shower edge and silicone line with a microfibre cloth or squeegee so water doesn't pool along the bead.
In kitchens and laundries, do the same thing in a smaller way. Dry splash zones, don't leave soaked cloths bunched up nearby, and report drips early if a tap or pipe is leaking.
A simple weekly reset
A quick weekly bathroom clean matters more than occasional heavy scrubbing. Focus on the places that stay damp longest, especially silicone joins, shower tracks and corners.
- Ventilate daily so moisture doesn't sit in still air.
- Dry the sealant line after showers when you can.
- Clean lightly each week instead of waiting for visible build-up.
- Act on leaks fast because persistent moisture beats every cleaning routine.
For another area that often affects the overall bathroom finish at inspection time, this guide on how to clean floor tile grout is worth adding to your vacate checklist.
The big picture is simple. Mould loves trapped moisture, poor airflow and neglected edges. Tenants who keep those three things under control usually avoid the ugly silicone surprise when lease end rolls around.
If your bathroom silicone still looks risky and you'd rather not guess whether it will pass inspection, End Of Lease Cleaning Melbourne can help you assess the cleaning side of the job and decide whether the smarter path is mould treatment or arranging replacement before final inspection.
